
Create an event
Building an event happens on one page. Name, date, place, tickets, description, and image sit in front of you, and everything else waits inside a More options dropdown. There is no review screen at the end: the page you filled in is the review, with Publish event at the bottom.
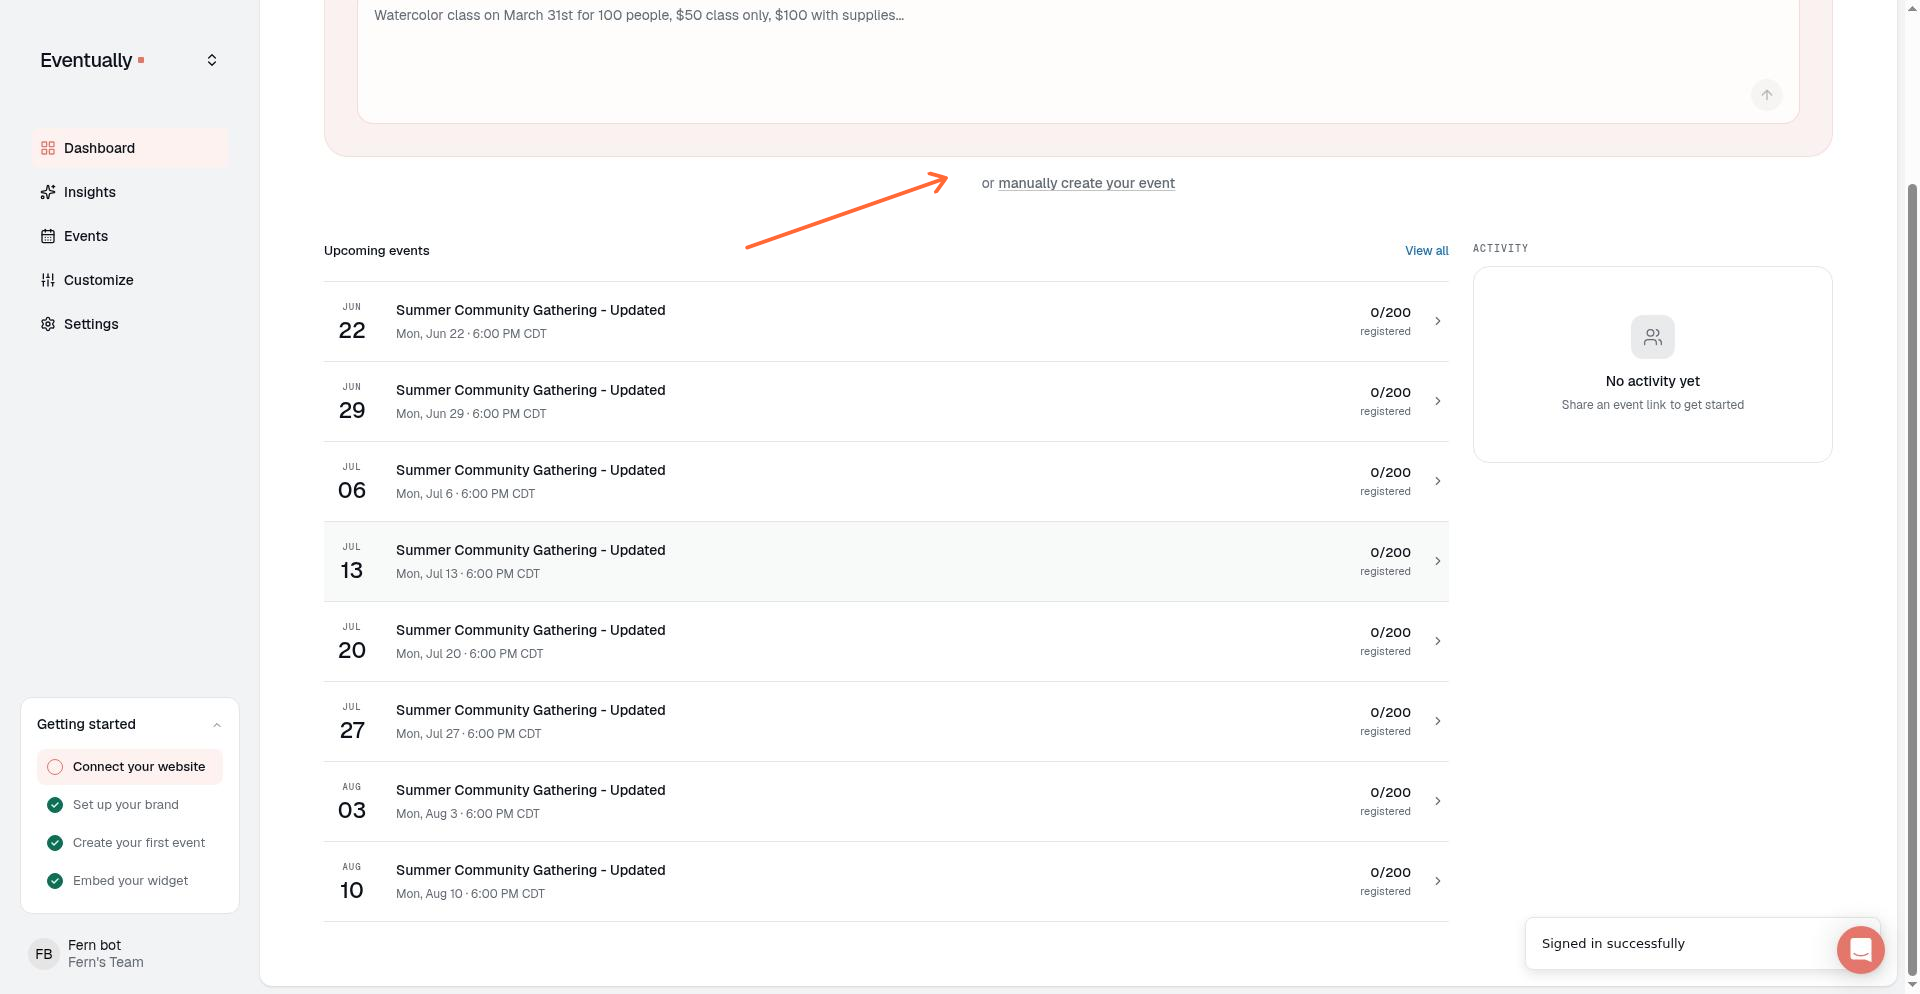
Start from your Eventually dashboard by clicking manually create your event. That control starts a fresh event and does not resume an abandoned Evie draft. On first-run New Event you can also choose Build your event manually from the Evie prompt.
Event details
Only the event name is required to save. Title and date appear on your public page the moment you publish, so those two are worth getting right first. Location is public too unless you hide it until registration, a per-event option in the Location card. Everything else can change later.
Event name
Date & time: the start and end, covered below.
Location: pick In person, Virtual, or Hybrid, then fill in the venue name, address, or join link that applies.
A join link is only sent to registered attendees in their confirmation, and never appears on your public page. Hybrid events show the address publicly and keep the join link private, unless you hide the address until registration. For the full breakdown, see Date, time, timezone, and location autocomplete.
Set the date and schedule
Enter the start and end in the Date & time field, then use its Single or Recurring switch to choose how the event repeats:
Single: a one-time event. Press + beside the times to add extra one-off dates, so the same event runs on several specific dates.
Recurring: a repeating schedule. Pick a pattern under Repeats (every week, every 2 weeks, or monthly on the same weekday position), or choose Custom schedule… for other patterns, end conditions, and the time zone. Recurring events need the Essentials plan or higher.
For recurring events you can set a Title template using tokens such as {month}, {date}, {day}, and {ordinal}. A Custom title list, one line per occurrence, overrides the template for individual dates. Click a token chip below the template field to copy it, then paste it where you want it in the template.
Choose how people register
The Tickets card is one choice between three modes, and each reveals only the fields it needs.
Free: guests register through Eventually. Squarespace Commerce is not required.
Paid: set the price guests pay. Paid tickets check out through your Squarespace store.
External registration: Eventually shows a button on your public page that links out to another registration system. You must supply the registration URL before you can publish, and you can set the button text and an optional display price.
Set Capacity here to cap attendance for standard-seat tickets, or leave it blank for unlimited. Add-ons do not consume seats, and virtual tickets use their own capacity pool. Per-ticket limits live in the Tickets & sales drawer.
Add a description and image
Write your description in the rich-text editor below the Tickets card, or click Write with AI for a first draft. The Normal, H3, and H2 toolbar buttons highlight the style of the text at your cursor, so you always know which format is active.
To skip the Read more fold on public views, check Always show the full description under the description editor. The setting is off by default and applies to this event only: when it is on, buyers see the whole description with no Read more toggle on the widget, the hosted event page, and other public event views. Recurring occurrences and duplicated events carry the setting from the original event.
Add images in the Imagery card below the description: up to 10 per event, each 5 MB or smaller. The first image is the primary one, and you can drag images to reorder them. See Add multiple images to an event.
More options
Everything beyond the essentials sits inside the single More options dropdown. It opens itself whenever one of its drawers already holds something, so a duplicated or edited event shows its own settings without hunting.
Tickets & sales: ticket types, add-ons, pooled capacity, and sale rules.
Registration questions: what you collect from each guest, and when.
Emails & reminders: confirmation and reminder timing, on by default.
Organize: categories, private tags, and featuring the event on your widget.
What to expect: skill level, what's included, what to bring.
More info button: a secondary link on your public event page.
Choosing External registration hides Tickets & sales, Registration questions, Emails & reminders, and More info button, since we are not handling registration. Organize and What to expect stay available.
Registration questions
Name and email are always collected. Click Add question to build your own fields, choosing from Short text, Long text, Email, Phone, Number, Date, Single select, Multi-select, Yes/No, and Checkbox (single). Single select and Multi-select questions take a list of options.
This drawer also holds the timing of additional questions: collect them before checkout, after checkout, or not at all. Free registrations always collect name and email regardless of that timing, so the setting applies only to the questions you add.
Emails and reminders
Pick a communication level: Simple for manual check-in, Engaged to make QR optional, or High-Touch to send QR by default. Engaged is the default.
More info button
Add an optional link that points attendees to more information about your event. Fill in both the URL and Button text fields, because the link appears only when both are set. The URL must start with http:// or https:// and include a hostname, and the button text is limited to 100 characters. The link is informational only, not an alternative way to register. It is not shown on external-registration events because those already link away from Eventually, and the drawer is hidden when you choose External registration.
What to expect
Set the event skill level, what is included, and what to bring. The skill level choices come from the saved skill level scale for your team, and guests see the level on the event page and widget only after that scale is saved.
Publish
Click Publish event at the bottom of the page. On an event that is already published, the same button reads Save Changes. To keep working on it later without going live, click Save as draft instead.
External-registration events cannot be published without a registration URL, and Eventually-registration events need at least one ticket type.
If the event has paid tickets and your checkout is not connected yet, Publish event opens To sell tickets, connect your Squarespace store instead of going live:
Connect Squarespace returns you to the builder with your in-progress event restored. Connecting does not publish it, so click Publish event again when you get back.
Keep it free publishes with free tickets.
Continue, sales open when you connect publishes now, and buyers see Sales open soon until checkout is connected.
For the full connection steps, see Connect your Squarespace site.
Publishing a past-dated single event
If you set a single event date in the past and publish, a confirmation asks you to publish anyway, because the event goes straight to your Completed events: it will not show in Upcoming or take new registrations.
The same warning appears on the event detail page and in the events list row menu. It is a soft check, so you can proceed if you deliberately want the event live for historical reference. Recurring series events do not trigger it, because their status is managed separately.
Past-dated published events land in the Completed tab and do not accept new registrations. If you meant to run the event in the future, change the date before publishing.
Time zone behavior
New events start in your team's default time zone, set under Customize → Event defaults. On a recurring event, change it in the Date & Time dialog that Custom schedule… or Edit series details opens. On an event you have already saved, change it when you edit the event's details from its event page. We store the event with that time zone and show it in the event's own time zone on the public event page, the calendar widget, and attendee confirmation and reminder emails.
After publishing
Your event appears on your site's calendar widget and opens for registration. To change it later, see Edit an event.
Related guides
Set event capacity and ticket limits: total capacity vs. per-ticket limits and sold-out behavior
Edit an event: modify event details after creation
Using Evie (AI) to create an event: first-run persona, Evie prompt, read-only review, and draft resume
Creating recurring events: set up repeating schedules for classes and workshops
Reorder ticket tiers for an event: arrange ticket types in your preferred order