
Edit an event
If you're editing a recurring event, you'll choose which dates to update. See Creating recurring events for details on edit scopes.
After creating an event, you can update its details anytime from the event detail page. Open any event to modify the title, description, schedule, location, categories, tags, and more.
Open the event editor
Navigate to Events in your Eventually dashboard.
Click the event you want to edit.
On the event detail page, click the Edit button (pencil icon) to open the editor drawer.
The editor opens as a drawer on the right side of your screen with the title Edit event.
Edit event details
Inside the editor drawer, you can modify:
Title— The event name displayed on your calendar widget.
Description — The full event details shown to visitors.
Start and End — The event date and time. The time zone is used on the public event page, calendar widget, and in attendee emails. See Creating an event with the 4-step wizard for details.
Location — Where the event takes place.
Categories — Organize events into groups for filtering.
Tags — Additional labels for internal organization.
Images — Add or remove event photos.
Manage event categories
Categories help visitors filter your calendar by event type. You can add or remove categories from any event, or create new categories directly from the editor.
Add or remove categories
In the Categories section of the editor, you'll see category chips with colored dots indicating each category's color:
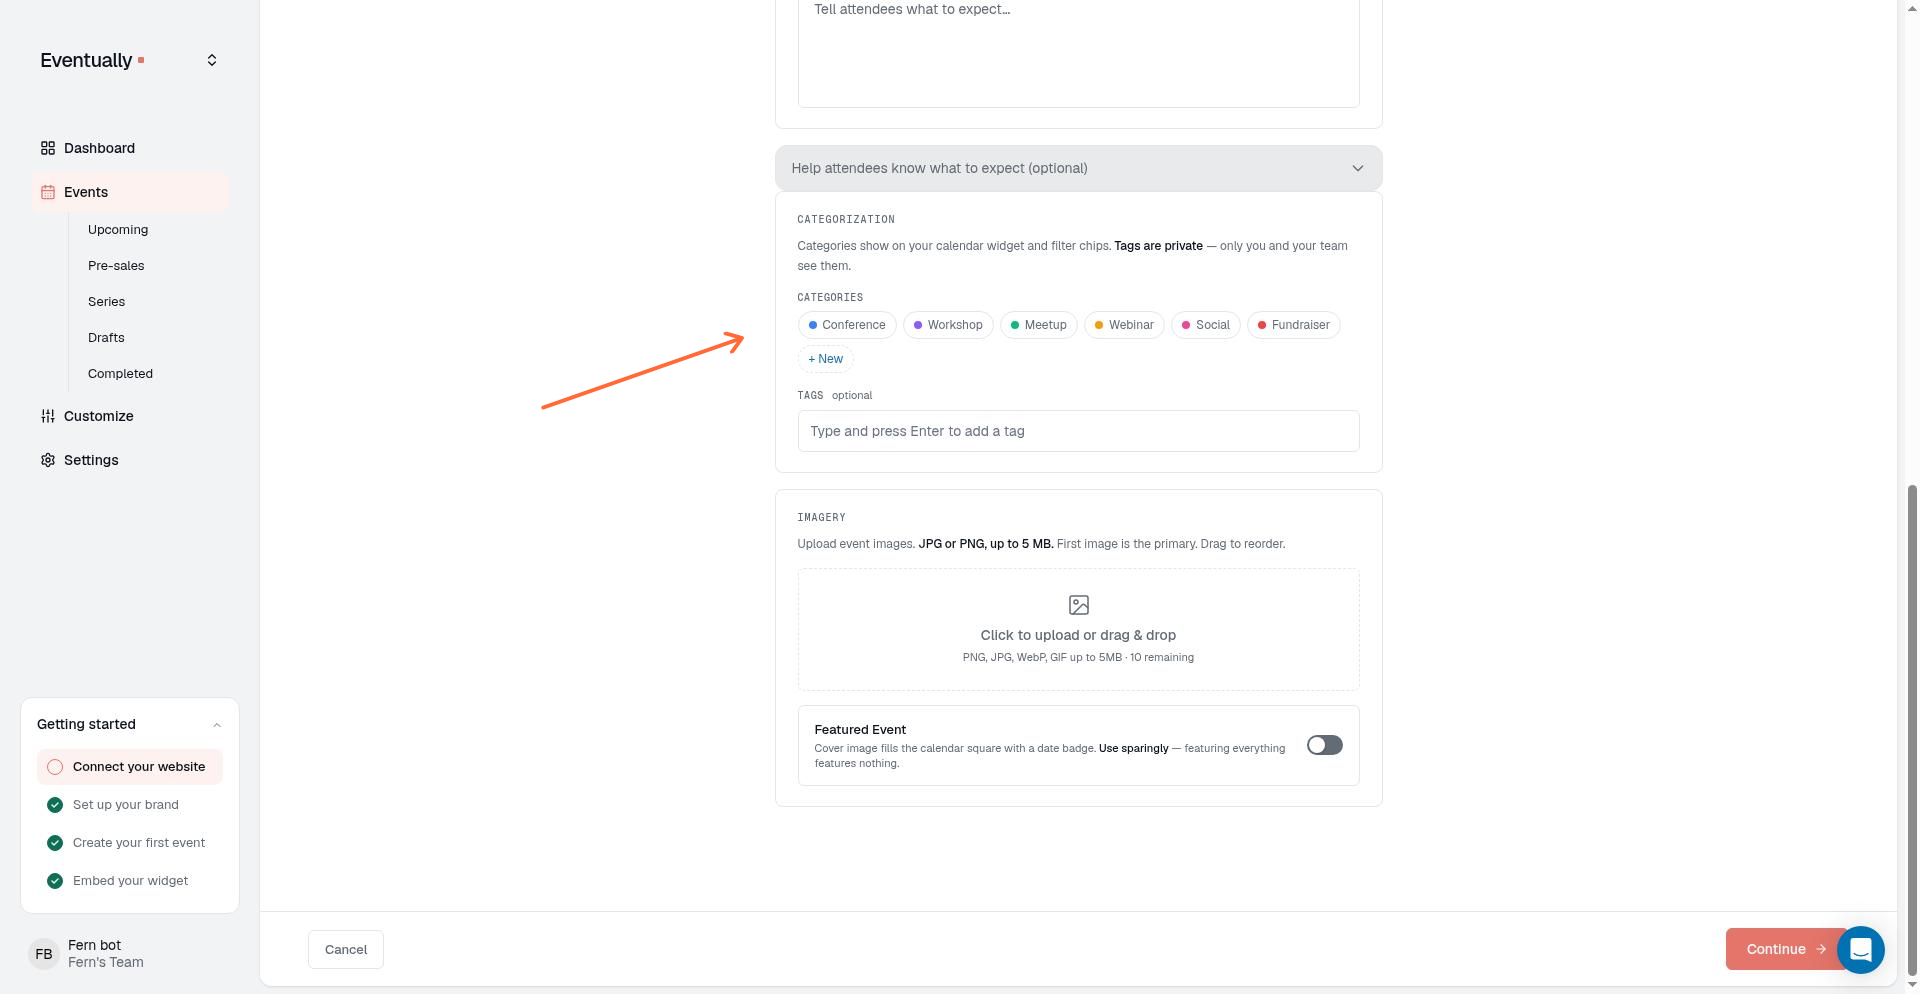
Click any category chip to select it. A selected category shows a checkmark.
Click a selected category chip to deselect it and remove it from the event.
Create a new category
You can create a new category without leaving the event editor:
Click + New next to the category chips.
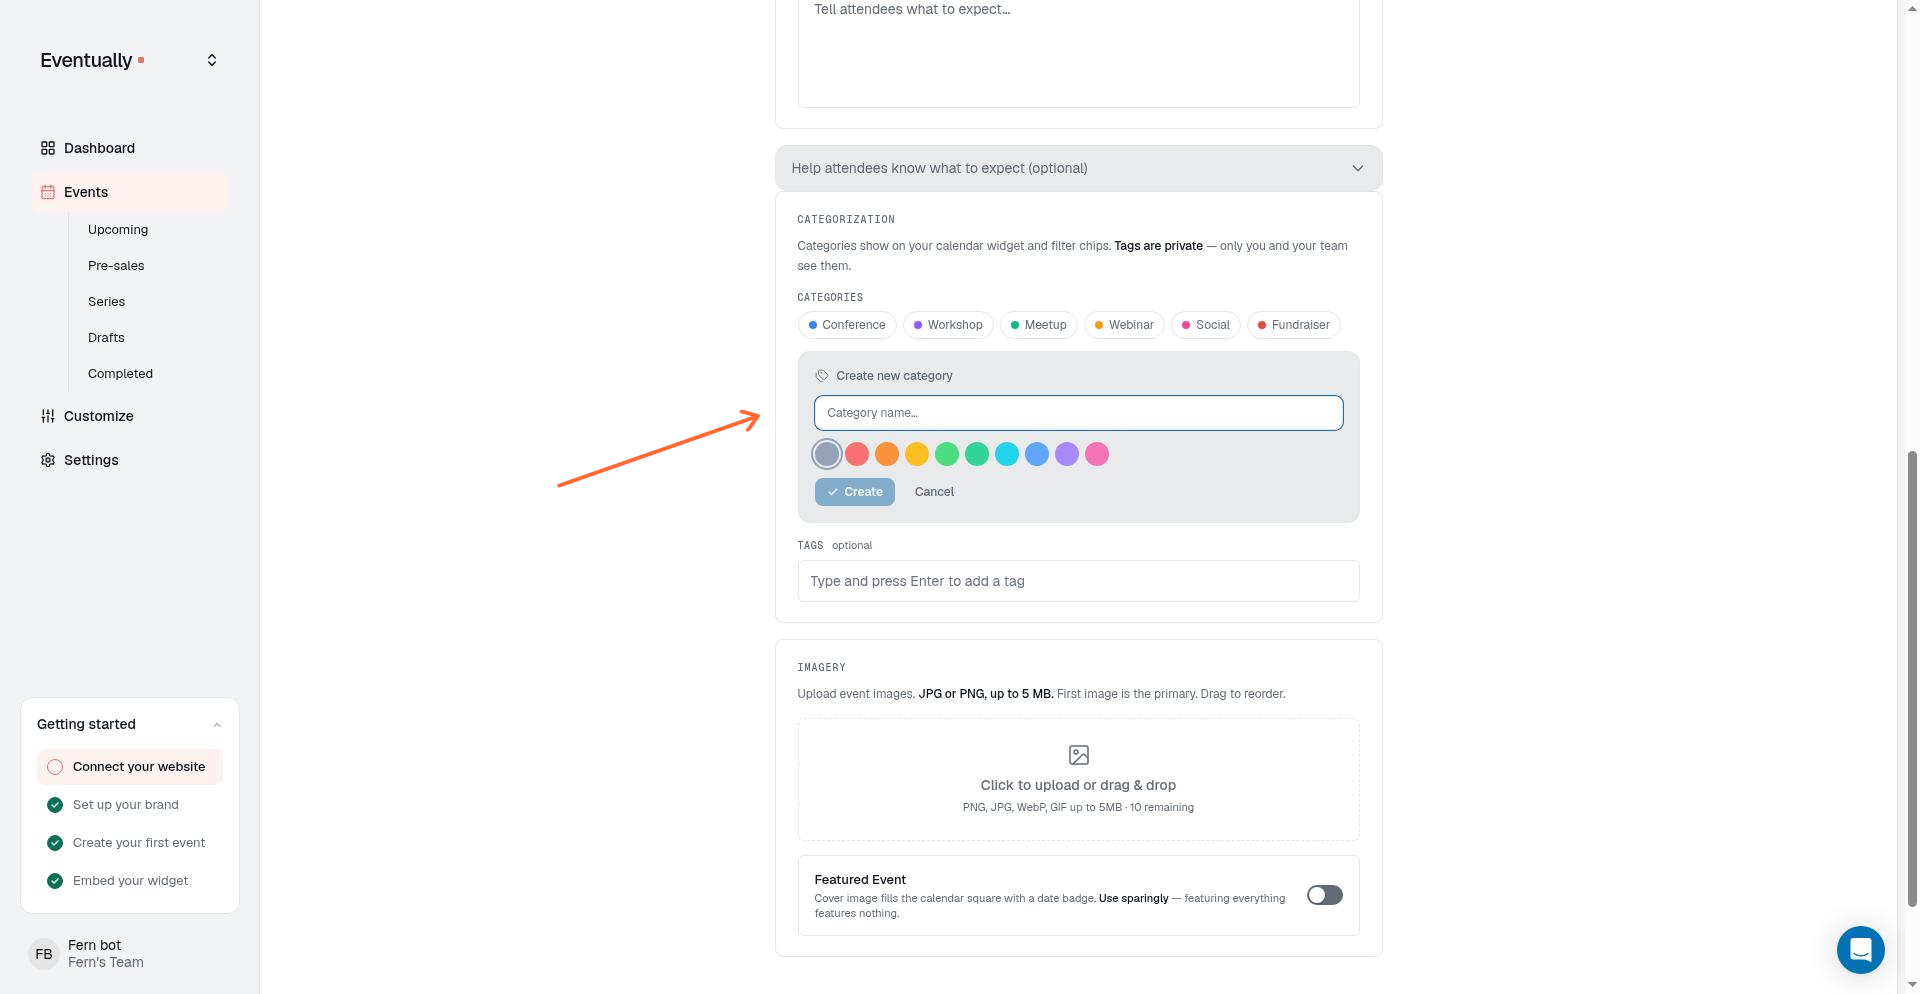
Enter a category name in the text field.
Select a color from the swatch palette.
Click Create.
The new category is added to your account and automatically selected for this event. You can deselect it if you don't want to apply it.
Creating a category here adds it to your account-wide category list. The category becomes available for all future events, not just the one you're editing.
Save your changes
After making changes:
Click Save changes at the bottom of the drawer.
The button changes to Saving... while your updates are submitted.
Once saved, the drawer closes and your changes appear on the event detail page.
If there's an error, the drawer stays open and displays an error message. Fix the issue and try saving again.
Related guides
Creating recurring events — Set up repeating schedules for classes and workshops
Import events from a CSV file — Bulk import events from another platform
Set up your calendar widget — Configure category filters for visitors
Choose when to collect attendee details — Control when guests fill out registration fields